Sliced Chicken Perfection How to Make It
There’s something about the smell of baking that instantly makes me feel at home. As a kid, I remember waking up on weekends to the comforting aroma of cinnamon and butter wafting through my mom’s kitchen—the kind that makes you want to plop right down at the table with a messy plate of leftovers and a big glass of milk. Over the years, I’ve tried countless coffee cake recipes, but this one has a special place in my heart. It’s embarrassingly simple but tastes like it’s coming from a bakery—moist, flavorful, with those lovely swirls of zucchini and a hint of spice. Honestly, my kids ask for this all the time, and I love how sneaky healthy it feels with all that zucchini sneaking in. It’s the kind of recipe I always do when I need a little cozy comfort or a sweet treat that won’t ruin my diet. Trust me, once you try this, it’s going to be a new family favorite that disappears in minutes at your house too!
What is Zucchini Swirl Coffee Cake?
Think of it as a mash-up between a classic cinnamon coffee cake and a sneaky veggie bake—only you don’t have to feel guilty about seconds. It’s essentially a tender, buttery cake layered with cinnamon-spiced zucchini, creating a marbled effect that’s as pretty as it is delicious. The name might sound fancy, but honestly, it’s just a quick combo of a simple batter and a flavored zucchini mixture swirled through, baked until golden and irresistibly moist. The idea came from my grandma’s love for making everyday ingredients shine—plus, I wanted to create something that would satisfy that afternoon sweet craving without sending me overboard. Whether it’s for breakfast, a snack, or dessert, this recipe works equally well, and I love how flexible it is—batch it up on Sunday, and you’ve got breakfast for the week. It’s a cozy, homemade hug in cake form, crossing the line between healthy and indulgent without making you feel bad afterwards.
Why you’ll love this recipe?
What I love most about this zucchini swirl coffee cake is how it manages to be so soft and flavorful while sneaking in veggies that nobody notices. The tender crumb—thanks to a simple combination of yogurt and oil—means it’s basically foolproof, which is perfect when I’m rushing or just want a cozy bite without much fuss. The cinnamon-sugar swirl isn’t just pretty; it adds a warm caramelized flavor that makes everyone reach for a second slice. Plus, the zucchini keeps the cake super moist—I’ve tested this with grated carrots and apples too, and it’s just as good (if not better). The best part? You can make this with pantry staples, so it’s budget-friendly. I swear, what sets this apart from other coffee cakes is that rich, wholesome taste, with just a hint of sweetness that’s perfect with a steaming mug of coffee or tea. This one’s a lifesaver on busy nights and a guaranteed hit when I want to surprise friends with a little homemade charm. My kids ask for this all the time, especially when they see little green flecks peeking through the swirls—it’s like magic, and they think it’s the coolest thing ever!
How do I make Zucchini Swirl Coffee Cake?
Quick Overview
This recipe is all about layering simple ingredients into a one-pan bake that’s speedy and insanely tasty. You start by making a basic buttery batter, then preparing the zucchini cinnamon swirl—kind of like a quick compote—that gets folded and swirled through the batter. A quick bake later, you get a fragrant, golden coffee cake with a gorgeous marbling effect. The whole process takes under an hour, and the best part? It’s pretty much impossible to mess up. I always do this when I want something warm and sweet—it’s a real comfort on a lazy Sunday or a midweek treat. The magic lies in the swirl—it’s almost addictive to watch as it forms that marbled pattern. Honestly, I think you’ll find the process as satisfying as the taste.
Ingredients
For the Main Batter:
– 1 ½ cups all-purpose flour (or gluten-free blend if you prefer)
– 1 teaspoon baking powder
– ½ teaspoon baking soda
– ¼ teaspoon salt
– ½ cup granulated sugar
– ½ cup brown sugar
– ⅓ cup vegetable oil or melted butter
– 2 large eggs
– ½ cup plain Greek yogurt or sour cream
– 1 teaspoon vanilla extract
For the Filling:
– 1 medium zucchini, grated and drained well (trust me, moisture is your enemy here)
– 2 tablespoons brown sugar
– 1 teaspoon ground cinnamon
– 1 tablespoon melted butter (for richness)
For the Glaze:
– ½ cup powdered sugar
– 1-2 teaspoons milk (or lemon juice for a zing)
– ½ teaspoon vanilla extract
Step-by-Step Instructions
Step 1: Preheat & Prep Pan
Set your oven to 350°F (175°C). Grease a 9-inch round or square baking pan with butter or non-stick spray. Lining the bottom with parchment paper is just a bonus—I find that it helps the cake come out neat and clean after baking.
Step 2: Mix Dry Ingredients
In a large bowl, whisk together the flour, baking powder, baking soda, salt, and sugars. Mixing these first ensures everything’s evenly dispersed, so the cake rises perfectly and isn’t dense. I’ve learned that sifting isn’t always necessary but helps keep the batter light.
Step 3: Mix Wet Ingredients
In a separate bowl, whisk the eggs, yogurt, vanilla, and oil until smooth. I always do this first before adding to dry, because it helps avoid lumps and makes the batter nice and uniform. It should look slightly glossy and thick—this is your batter’s base.
Step 4: Combine
Add the wet mixture to the dry ingredients and fold gently until just combined. Overmixing is a rookie mistake that can make the cake tough—I always stop as soon as I don’t see streaks of flour. It’s better to have a few lumps than a dense batter!
Step 5: Prepare Filling
In a small bowl, toss the grated zucchini with the cinnamon, brown sugar, and melted butter. It should be moist but not swimming in liquid. If your zucchini is extra watery, give it a quick squeeze in a kitchen towel—trust me, a drier mix swirls better and keeps the cake moist without becoming soggy.
Step 6: Layer & Swirl
Pour half of the batter into your prepared pan and spread evenly. Spoon dollops of the zucchini mixture across the batter, then pour the rest of the batter over the top. Use a knife or skewer to gently swirl through the layers—that marbling effect is what makes this cake so pretty and fun to serve. Don’t overdo it; just a few gentle passes give the perfect pattern.
Step 7: Bake
Bake for 40-45 minutes, or until a toothpick inserted in the center comes out clean. My oven runs hot, so I start checking around 38 minutes. If the top gets too dark, tent with foil—I want that golden glow but not burnt edges. The smell alone will make your whole house cozy.
Step 8: Cool & Glaze
Let the cake cool in the pan for at least 15 minutes. Once slightly cooled, drizzle with the powdered sugar glaze—simply mix the powdered sugar with milk and vanilla until smooth. I like adding a splash of lemon juice sometimes—it cuts through the sweetness and adds a little tang. Pour it over the warm cake, letting it drip down the sides, and enjoy that shiny finish.
Step 9: Slice & Serve
Use a sharp serrated knife for clean slices. I swear, this cake is best enjoyed warm or at room temperature, with a cup of coffee or tea. Sometimes I dust a little extra cinnamon on top for those extra cozy vibes. It’s like a hug in every bite, and my family can’t get enough.
What to Serve It With
This cake just screams for a steaming cup of coffee or a cold glass of milk. My family loves to have it in the mornings with a few slices of fresh fruit—think berries or sliced peaches—making breakfast feel like a special treat. On lazy weekends, I serve it with a dollop of whipped cream or a scoop of vanilla yogurt, turning it into a nice little dessert. It’s also fantastic for brunch, paired with a fruit salad or a splash of sparkling wine for a fancy touch.
At dinner parties, I like to serve slices with a drizzle of honey and a sprinkle of chopped nuts—almonds or pecans work beautifully. The versatility of this cake is what keeps us coming back —it’s nice enough to impress guests but simple enough to whip up on a weeknight when you need comfort stat.
Top Tips for Perfecting Your Zucchini Swirl Coffee Cake
Over the years, I’ve learned a few tricks to make this cake even better. First, always squeeze out as much moisture as possible from the zucchini—moisture is what can make the cake gummy or soggy if you don’t. I keep a clean kitchen towel handy for this. Using Greek yogurt instead of sour cream gives the cake a little extra tang and keeps it tender. When swirling, don’t go too deep—just enough to create that lovely marble pattern without blending the layers completely. Experiment with the cinnamon sugar ratio; I find that a little extra cinnamon makes it more flavorful without overpowering. Ingredient swaps—try using applesauce instead of oil for a healthier version or brown sugar for a richer flavor. Baking times can vary depending on your oven—my tip is to start checking around 38 minutes, then go from there. Patience pays off—don’t open the oven door too often, or the cake might sink (been there!). And if you’re feeling fancy, toss in some chopped walnuts or a handful of chocolate chips—trust me, it’s a game-changer. The secret is in the balance—moist texture, flavorful swirl, and just enough sweetness to satisfy that dessert craving. Each time I make this, I learn something new, which just makes me love it more.
Storing and Reheating Tips
Once cooled, this cake stays fresh for about two days at room temperature—just cover it loosely with foil or put it in a cake container. I find that it develops even more flavor after a day or two. If you want to keep it longer, pop it in the refrigerator; just make sure it’s wrapped tightly so it doesn’t dry out or pick up other fridge odors. This cake is surprisingly good cold or slightly warmed—just pop a slice in the microwave for 10-15 seconds until it’s warm and soft. For longer storage, I wrap individual slices in plastic wrap and freeze—perfect for grab-and-go breakfasts or late-night indulgence. When reheating, just microwave until warm—if you heat it too long, it can become a little rubbery, so keep an eye on it. As for the glaze, I usually prefer to add it fresh on the day I plan to serve it—keeps everything looking shiny and tasting fresh.
Frequently Asked Questions
Final Thoughts
This zucchini swirl coffee cake has become a cherished part of my baking repertoire. It’s the kind of recipe that makes everyone feel at home, with its tender crumb and cozy cinnamon scent. I love how forgiving it is—no fussing over complicated steps, just honest baking with ingredients I always keep on hand. The best part? It tastes even better the next day, making it perfect for mornings when I want something warm waiting for me. Whether you’re celebrating a family morning, hosting brunch, or just want a gentle treat after a long day, this cake hits the spot. I hope you try it and love it as much as my family does. Drop me a comment below if you give it a shot—I’d love to hear how it turns out! Happy baking!

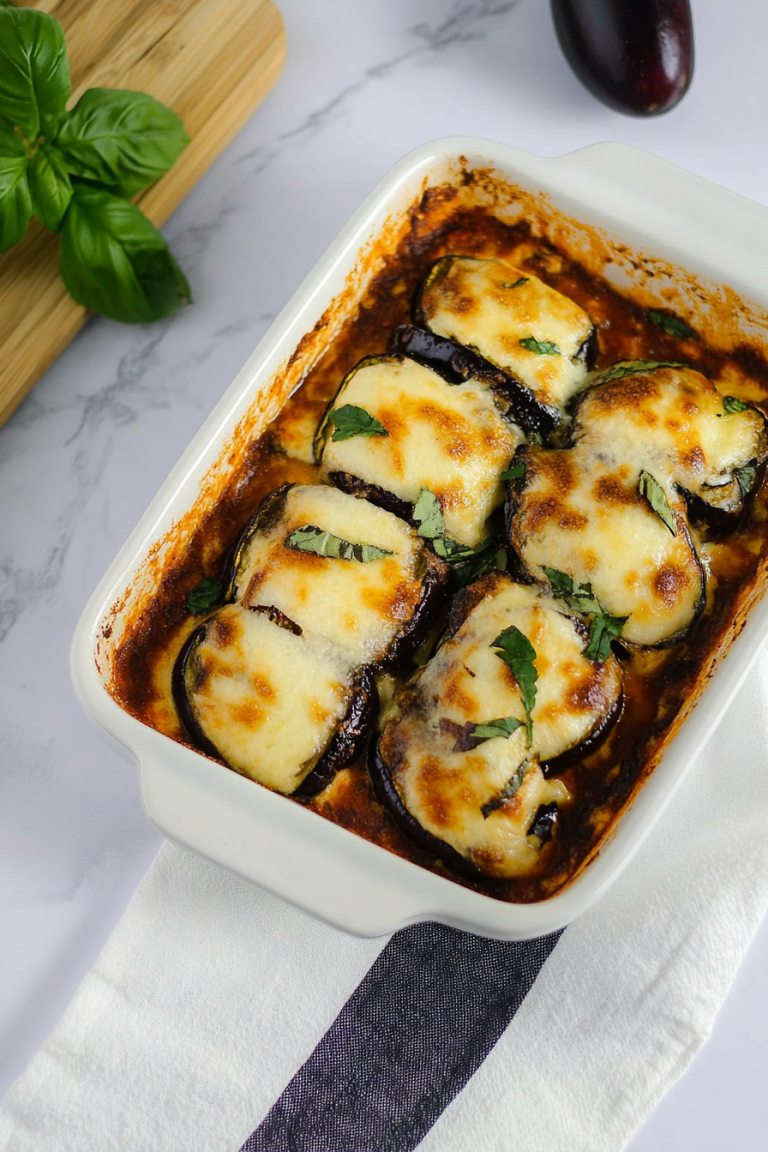
Hasselback Chicken
Ingredients
Method
- Preheat oven to 400°F. Spray an 8x8-inch glass baking dish with cooking spray. Set aside.
- Make 5-6 slices, about ¾ inch apart, into the top side of the chicken, being careful not to cut all the way through.
- Combine ranch seasoning mix, dried parsley flakes, salt, and black pepper in a small bowl.
- Season each chicken breast with the seasoning mix, ensuring the mixture gets into the slices.
- Gently open each of the slices and insert a piece of Canadian bacon and zucchini slices. Feel free to add more if needed.
- Transfer the stuffed chicken breasts to the prepared baking dish, filling side up. Top each with shredded Monterey jack cheese, pressing some into the crevices.
- Bake for 25 minutes or until the internal temperature reaches 165°F and the cheese is browned. Rest for 2-3 minutes before serving.