Easy Chicken Rice Recipe for a Flavorful Dinner
There’s something about the smell of cinnamon and baked goodies mingling together that immediately takes me back to lazy weekend mornings at my grandma’s house. I remember sitting at her old kitchen table, watching her effortlessly whip up this incredible zucchini coffee cake — a recipe I now cherish and tweak over the years to make it even better. It’s honestly my go-to when I want something comforting and sweet but still light enough for breakfast or a casual afternoon treat. The best part? It’s insanely easy to make, even if your kitchen’s a bit chaotic. Plus, I always do this when I have some leftover zucchinis from the garden — it turns humble veggies into a showstopper that everyone asks for again and again. This isn’t just a recipe; it’s a little piece of my family home, because trust me, the smell alone brings everyone right to the table. Whether you’re baking for your family or just craving something sweet with your coffee, this zucchini coffee cake is a lifesaver on busy nights or slow, cozy mornings. Let’s get baking!
What is Zucchini Coffee Cake?
Think of this zucchini coffee cake as a happy marriage between a moist crumb cake and a cinnamon swirl loaf. It’s essentially a soft, tender cake with grated zucchini sneaked right in—kind of like a secret ingredient that keeps everything super moist and flavorful without overpowering the palate. The name might sound fancy, but it’s honestly just a cake that pairs perfectly with a steaming mug of coffee or tea. The zucchini adds a subtle veggie sweetness, while the cinnamony swirl and crunchy topping give it that irresistible texture overload. It’s a beloved breakfast, brunch, or anytime treat that’s easy to whip up, and I swear, it’s the kind of recipe that gets better with every leftover piece. Think of it like a cross between a classic coffee cake and a cozy homemade muffin — but finished with a gorgeous cinnamon swirl on top.
Why you’ll love this recipe?
Honestly, what I love most about this zucchini coffee cake is how versatile and forgiving it is. It’s one of those recipes you can throw together with ingredients you already have in your kitchen, and it still turns out perfect every time (trust me, I’ve tested it with whole wheat flour, almond milk, and even a dash of nutmeg for a little twist!). The flavor? Absolutely divine. You get that warm cinnamon aroma mingling with the subtle sweetness of zucchini — it’s like a hug in every bite. Plus, it’s insanely moist without feeling heavy — a rare combo that took me a few tries to nail.
What’s even better? It’s budget-friendly! You probably already have most of these ingredients on hand. This one’s a lifesaver on busy nights or when you want something homemade but don’t want to spend hours baking. And let’s not forget how pretty it looks — the cinnamon swirls make it a real showstopper for brunch or dessert. My kids ask for this all the time, and honestly, I don’t mind because I know they’re eating something a little healthier. It’s just comfort food at its finest, served with a warm cup of coffee or tea. Whether it’s for a family gathering or a simple weekend treat, this zucchini coffee cake never fails to bring a smile.
How do I make Zucchini Coffee Cake?
Quick Overview
This cake comes together quickly, thanks to a straightforward batter that’s stirred just enough to combine everything without overmixing. The grated zucchini keeps it beautifully moist, while the swirl of cinnamon and sugar adds that irresistible swirl of flavor. I love to bake this in one pan — no fussing over layers — and because it’s so forgiving, you can tweak the sweetness or the swirl pattern to match your mood. Just toss everything in a bowl, pour it into your pan, add the cinnamon topping, and bake until a toothpick comes out clean. It’s a one-bowl wonder that smells incredible — that’s probably why my whole house smells like a cinnamon wonderland in no time. Once it’s out of the oven, I let it cool just enough so the glaze (if I top it with one) won’t melt away, then slice it up and dig in. Seriously, this cake is a breeze, and I promise, the whole family will love it!
Ingredients
For the Main Batter:
– 2 cups all-purpose flour (or gluten-free flour blend if you prefer)
– 1 cup granulated sugar
– 1 teaspoon baking powder
– 1/2 teaspoon baking soda
– 1/2 teaspoon salt
– 1 teaspoon ground cinnamon
– 1/2 cup vegetable oil (or melted butter if you’re feeling extra indulgent)
– 2 large eggs
– 1 teaspoon vanilla extract
– 1 cup grated zucchini (squeeze out excess moisture with a clean towel)
For the Cinnamon Swirl:
– 1/4 cup brown sugar
– 1 tablespoon ground cinnamon
For the Glaze (optional but highly recommended):
– 1/2 cup powdered sugar
– 1-2 tablespoons milk or cream
– A splash of vanilla (for flavor)
Step-by-Step Instructions
Step 1: Preheat & Prep Pan
Start by preheating your oven to 350°F (175°C). Grease a 9-inch square or round baking pan, or line it with parchment paper — I always do this because it makes cleanup a breeze. And honestly, it helps the cake come out perfectly without sticking. Set your pan aside while you prepare the batter.
Step 2: Mix Dry Ingredients
In a large mixing bowl, whisk together the flour, sugar, baking powder, baking soda, salt, and cinnamon. This step builds the foundation so everything mixes evenly and the cake bakes uniformly. I like to do this first because it saves me from overmixing later on.
Step 3: Mix Wet Ingredients
In another bowl, beat the eggs with the oil, vanilla, and a splash of milk if you’re using it. I’ve tested this with almond milk, and it actually made it even creamier! Then, add the grated zucchini and mix until just combined. The zucchini should be evenly dispersed, and the mixture should look a little glossy and thick.
Step 4: Combine
Now, pour the wet mixture into your dry ingredients. Use a spatula or a wooden spoon to fold everything together gently — don’t overmix or the cake might turn tough. Mix just until you see no streaks of flour. The batter will be thick but pourable.
Step 5: Prepare Filling
In a small bowl, combine the brown sugar and cinnamon for that signature swirl. You can add a pinch of nutmeg or cardamom if you’re feeling fancy. This adds a lovely sweet warmth to every bite.
Step 6: Layer & Swirl
Pour half the batter into your prepared pan. Then, sprinkle half of the cinnamon sugar mixture evenly over it. Add the remaining batter on top, and sprinkle with the rest of the cinnamon mixture. Use a knife or skewer to swirl gently through the layers — don’t overdo it, but a few swirls give a beautiful marbled effect and ensure every piece is bursting with cinnamon flavor.
Step 7: Bake
Pop it into your oven and bake for about 35-40 minutes. I start checking around 35 minutes; insert a toothpick in the center — if it comes out clean, you’re good! If it needs a little extra time, give it 5-minute increments. Every oven is different, so keep an eye on it.
Step 8: Cool & Glaze
Once baked, let the cake cool in the pan for about 10 minutes. Then, transfer it to a wire rack or serve straight from the pan if you’re impatient — I can’t resist breaking into it while it’s still warm! If you want to add a glaze, mix powdered sugar with milk and vanilla until smooth, then drizzle it over the cooled cake for that lovely shiny finish.
Step 9: Slice & Serve
Slice it into squares or wedges — I love to cut thick slices, especially if I’ve added glaze. Serve it warm or at room temperature, with a dollop of whipped cream or a scoop of vanilla ice cream if you’re feeling extra indulgent. This cake disappears in minutes at my house, especially when you have a hot cup of coffee waiting — it’s just THAT good.
What to Serve It With
Oh, so many ideas! For breakfast, I love serving this with a strong cup of coffee or a glass of cold milk. The kiddos think it’s dessert, so I often make a batch just for them on weekends. If you’re doing brunch, set out some fresh fruit on the side — strawberries, blueberries, or even sliced bananas work beautifully. The warm, cinnamon-spiced cake pairs wonderfully with a glass of orange juice or a mimosa for grown-up brunch vibes.
As an after-dinner treat, I sometimes dust it lightly with powdered sugar or add a drizzle of caramel for a richer flavor. It’s equally delicious served plain, especially if you prefer a less sweet option. My family loves this with a blob of Greek yogurt or a splash of cream, making it feel a bit more special. And, hey, leftovers are perfect toasted the next day — just pop a slice in the toaster for a quick, warm snack. It’s cozy, inviting, and honestly, one of my all-time favorites for anytime I want a little slice of happiness!
Top Tips for Perfecting Your Zucchini Coffee Cake
After making this countless times, I’ve picked up a few tricks. First, thoroughly squeeze out the excess moisture from your zucchini — I do this over the sink with a clean kitchen towel, and it really makes a difference. Too much liquid, and your batter gets runny, which can lead to a dense or soggy cake. Trust me on this one.
When mixing, resist the urge to overmix after adding the wet ingredients. Overmixing develops gluten, which can make your cake tough instead of tender. Fold gently and just until combined for that perfect crumb. To get a really pretty swirl pattern, I use a skewer or chopstick — just drag it through the batter in a figure-eight motion for beautifully marbled layers.
I love adding a little variation now and then. Swapping out brown sugar for maple sugar or honey gives it a different depth of flavor. Or, add a handful of chopped nuts or dried cranberries for extra texture. Baking temps and timings can vary depending on your oven, so start checking around 35 minutes — a toothpick inserted in the middle should come out clean.
For the glaze, I sometimes add a splash of bourbon or vanilla for an extra flavor boost. If you prefer a dairy-free option, coconut milk or cream works beautifully in the glaze, giving it a subtle tropical twist. Keep experimenting — that’s the joy of homemade baking, after all! The key is balancing the sweetness, moisture, and cinnamon goodness to match your taste buds. I’ve learned that patience and small tweaks make all the difference in creating a cake that’s both beautiful and delicious. And honestly, the smell while baking? It’s pure comfort. My biggest mistake? Forgetting to spoon out excess zucchini once — I ended up with a somewhat wetter batter that took a little longer to bake. Now I always squeeze it well — trust me! Overall, this recipe is a keeper, whether you’re a beginner or a seasoned baker.
Storing and Reheating Tips
This cake stays fresh for about 2 days at room temperature, especially if covered tightly with foil or a cake dome. I prefer refrigerating leftovers if you know you won’t finish it quickly — store slices in an airtight container, and they stay moist and tasty for up to 4 days. To reheat, just pop a slice in the microwave for about 15 seconds or warm it in the oven at 350°F (175°C) for 10 minutes. If you’ve glazed it, I recommend waiting to add the glaze until just before serving so it stays shiny and fresh.
Want to freeze it? Wrap individual slices tightly with plastic wrap, then foil, and they’ll keep well for up to 3 months. Thaw at room temperature or gently reheat. If you add the glaze after reheating, it’ll look glossy again and taste just as good as the day it was baked. So, no worries if you bake in advance — this cake travels well and makes the perfect grab-and-go treat. Just be sure to let it cool completely before wrapping so it doesn’t get soggy from trapped steam. This little trick keeps it tasting just as fresh as freshly baked!
Frequently Asked Questions
Final Thoughts
This zucchini coffee cake has become my family’s favorite treat—it’s soft, moist, perfectly flavored with cinnamon, and just the right touch of sweetness. I love how it feels special enough for brunch but simple enough for a weeknight dessert like no one’s watching. Whenever I bake this, my kitchen fills with that heavenly cinnamon aroma, and I know I’ve made something really comforting. Plus, sneaking zucchini into desserts is such a sneaky way to get more veggies in my kids’ diets—trust me, they never even notice. If you give this a try, I’d love to hear how it turned out! Feel free to experiment with your favorite add-ins or flavor tweaks. Happy baking — this one’s a real keeper, and I can’t wait for you to enjoy it as much as we do!

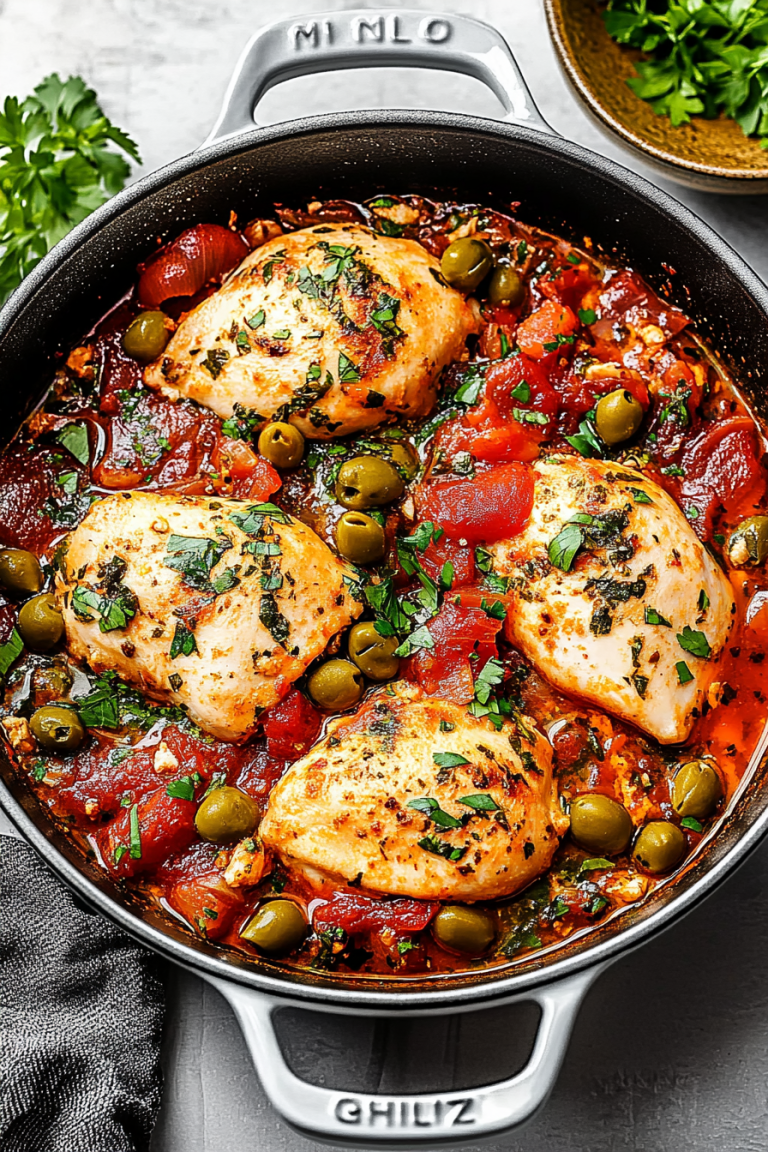
Arroz con Pollo
Ingredients
Method
- Season chicken with vinegar, 1/2 teaspoon sazon seasoning, adobo, and garlic powder. Let sit for 10 minutes.
- Heat a large deep heavy skillet over medium heat. Add 2 teaspoons olive oil when hot.
- Add chicken and brown for 5 minutes on each side. Remove from skillet and set aside.
- In a mini food processor, combine onion, cilantro, garlic, scallions, and bell pepper. Add the remaining olive oil to the skillet and sauté the onion mixture over medium-low heat until soft, about 3 minutes.
- Add diced tomato and cook for another minute. Add rice, mix well, and cook for another minute.
- Add water, chicken bouillon (ensure it dissolves completely), and the remaining sazon seasoning. Scrape up any browned bits from the bottom of the pot.
- Taste for salt; it should taste salty enough to suit your preference. Add more salt if needed.
- Add the chicken back into the skillet and nestle it into the rice. Bring to a boil, then reduce heat to low, cover, and simmer until most of the water has evaporated and the liquid is bubbling at the top of the rice line. Ensure the lid has a good seal to prevent steam from escaping.
- Cook for 20 minutes without opening the lid. Turn off the heat and let it sit with the lid on for an additional 10 minutes. Fluff with a fork before serving.