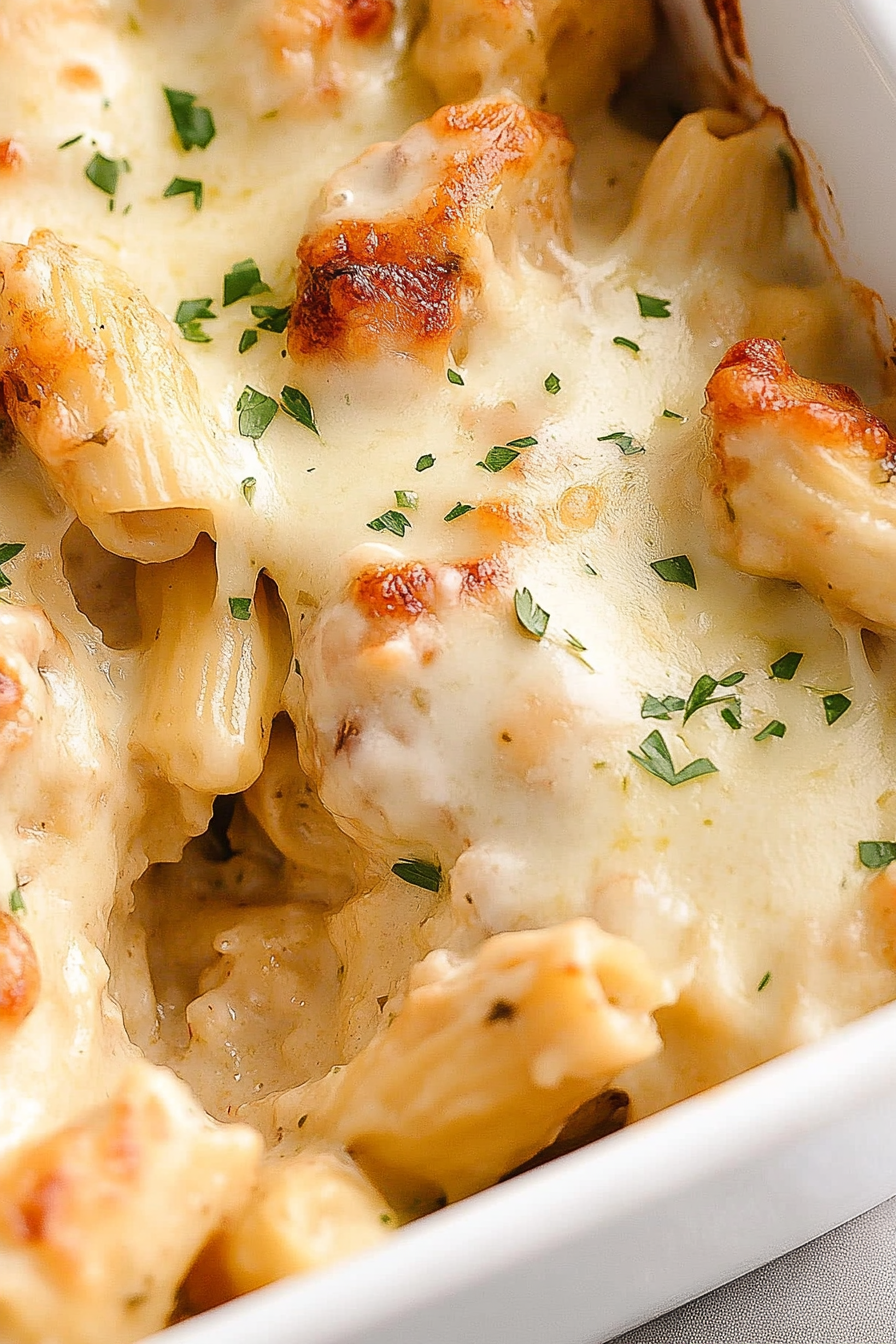
Creamy Chicken Bacon Ranch Delight
Oh, where do I even begin with this zucchini bread? It’s not just any zucchini bread, folks. This is *the* zucchini bread. The one that smells like pure comfort baking in the oven on a crisp autumn afternoon. The one my kids beg for every single week, and honestly, so do I! It’s funny, I used to think zucchini bread was just… well, zucchini bread. A bit dense, maybe a little bland. But then I stumbled upon this version, and my whole perspective shifted. It’s so incredibly moist, bursting with warm spice, and has this subtle sweetness that’s just perfection. I’ve tried so many variations over the years, and this one, with its perfectly balanced crumb and dreamy glaze, is the undisputed champion in my kitchen. It’s the kind of treat that makes a Tuesday feel like a weekend. If you’ve ever been intimidated by baking, or just want a foolproof recipe that always delivers, you’ve come to the right place. This is my secret weapon for unexpected guests, sad desk lunches, and those 3 PM cravings!
What is Zucchini bread?
So, what exactly *is* this magical thing we call zucchini bread? At its heart, it’s a quick bread – meaning you don’t need yeast or any complicated rising times. It’s made much like a cake or muffins, with a wet and dry ingredient mixture that gets combined and then baked. The “zucchini” part, of course, comes from the grated zucchini that gets mixed into the batter. Now, don’t let the idea of putting a vegetable in your sweet bread fool you! The zucchini does something incredible: it adds a phenomenal amount of moisture to the bread, making it unbelievably tender and almost impossibly soft. You don’t taste the zucchini itself, I promise! What you get is a beautifully moist crumb that holds up wonderfully to whatever delicious additions you toss in. Think of it as nature’s secret ingredient for the most delightful loaf you’ll ever pull from your oven. It’s humble, it’s hearty, and it’s surprisingly sophisticated.
Why you’ll love this recipe?
Honestly, why *wouldn’t* you love this zucchini bread? Let me count the ways! First and foremost, the FLAVOR. It’s not just sweet; it’s complex. There’s the warmth from the cinnamon and nutmeg, a hint of vanilla, and that subtle sweetness that’s just *right*. It’s never cloying, always comforting. Then there’s the TEXTURE. Oh, the texture! It’s unbelievably moist and tender, thanks to that magic ingredient – zucchini! It’s the kind of bread that melts in your mouth. And simplicity? This recipe is a lifesaver on busy nights. You can have it mixed up and in the oven in under 20 minutes. Seriously! The ingredients are pretty standard pantry staples, so it’s also incredibly COST-EFFICIENT. No fancy, expensive items needed here. Plus, it’s SO VERSATILE. I’ve got a few ways I love to serve it, which I’ll get into later, but the basic loaf is fantastic on its own. What I love most about this particular recipe is that it’s forgiving. I’ve accidentally a bit too much flour, or forgotten a dash of spice, and it still turns out wonderfully. It’s a true testament to a well-balanced recipe that’s designed for home cooks. If you’re a fan of banana bread or pumpkin bread, I guarantee you’ll adore this. It has that same cozy, welcoming vibe, but with its own unique charm. It’s also a great way to use up those extra zucchinis from the garden that seem to multiply overnight!
How do you make Zucchini bread?
Quick Overview
Making this incredible zucchini bread is surprisingly simple. We’ll start by getting our oven nice and hot and prepping our loaf pan. Then, it’s a matter of whisking together the dry ingredients, mixing the wet ingredients separately, and then gently combining them. The magic happens when we fold in the shredded zucchini and any optional add-ins, like nuts or chocolate chips. Finally, it’s into the oven to bake until golden brown and perfectly puffed. Once cooled slightly, a simple glaze finishes it off, adding that extra touch of yumminess. It’s a straightforward process that yields a spectacular result every single time. Trust me, you’ll be amazed at how easy it is to create something so delicious.
Ingredients
For the Main Batter:
You’ll need about 2 cups of all-purpose flour. Make sure it’s sifted for an extra light texture, although if you’re in a pinch, just whisking it well is fine too. I always keep a good quality all-purpose flour on hand. Then, we’ve got 1 teaspoon of baking soda and half a teaspoon of baking powder – this dynamic duo gives our bread its lovely lift. Don’t forget a pinch of salt to balance all the sweetness – about half a teaspoon. Now for the cozy spices: 1 teaspoon of ground cinnamon, a quarter teaspoon of ground nutmeg, and a tiny pinch of ground cloves (optional, but it really rounds out the flavor!). For sweetness, we’re using 1 cup of granulated sugar. Some people like to use half brown sugar for a bit more depth, and that works too! And then the wet ingredients: 2 large eggs, beaten, at room temperature. I always leave my eggs out for about 30 minutes before I start. Then, half a cup of neutral-flavored oil, like vegetable or canola oil. Some folks prefer melted butter, but I find the oil keeps it wonderfully moist for longer. And finally, the star of the show: 1 cup of grated zucchini. Make sure it’s packed down, and don’t worry about squeezing all the moisture out – that’s what we want! I usually use medium zucchini, but even the larger ones work, you just might get a tiny bit more liquid.
For the Filling (Optional but Recommended!):
This is where you can really personalize your bread! I love adding half a cup of chopped walnuts or pecans for a delightful crunch. Chocolate chips are another big hit in my house – about half a cup of semi-sweet or dark chocolate chips. You could even do a mix of both! Some people love dried cranberries or even a swirl of cream cheese, but that’s a whole other recipe!
For the Glaze:
This is super simple and makes all the difference. We’re going to whisk together 1 cup of powdered sugar with about 2 tablespoons of milk. You can use any milk – dairy or non-dairy works perfectly. If it seems too thick, just add another tiny splash of milk until you get a nice, drizzle-able consistency. For a little extra flavor, a teaspoon of vanilla extract is divine. Some people like to add a touch of lemon zest for a brighter note, which is also lovely!
Step-by-Step Instructions
Step 1: Preheat & Prep Pan
First things first, let’s get that oven preheating to 350 degrees Fahrenheit (175 degrees Celsius). This ensures it’s nice and hot when the batter is ready. While that’s happening, grab a standard 9×5 inch loaf pan. Grease it really well with butter or cooking spray, and then dust it with a little flour. I like to tap out any excess flour. Alternatively, you can line it with parchment paper, leaving some overhang on the sides so it’s easy to lift the bread out later – that’s my preferred method these days, less mess!
Step 2: Mix Dry Ingredients
In a large bowl, whisk together the flour, baking soda, baking powder, salt, cinnamon, nutmeg, and cloves (if using). Give it a good whisk for at least 30 seconds. This helps distribute the leavening agents evenly and breaks up any lumps in the flour, which is key for a nice, even rise and texture. No one wants a dense spot!
Step 3: Mix Wet Ingredients
In a separate medium bowl, whisk together the granulated sugar and the oil until well combined. Then, add the beaten eggs and whisk again until everything is smooth and beautifully emulsified. If you’re using vanilla extract in the batter itself (some recipes call for it here), add it now.
Step 4: Combine
Now, pour the wet ingredients into the bowl with the dry ingredients. Using a spatula or a wooden spoon, gently fold everything together until *just* combined. It’s really important not to overmix here! A few streaks of flour are okay; they’ll disappear when we add the zucchini. Overmixing develops the gluten too much, which can lead to a tough loaf, and we definitely don’t want that. We’re aiming for a tender crumb!
Step 5: Prepare Filling
If you’re adding nuts, chocolate chips, or any other mix-ins, this is the time! Gently fold them into the batter. Again, don’t overdo it. Just a few stirs until they’re distributed throughout. If you’re doing a swirl, like a cinnamon-sugar swirl or cream cheese filling, you’ll prepare that separately according to its specific instructions and add it during the layering step.
Step 6: Layer & Swirl
Now for the star ingredient! Add the grated zucchini directly into the batter. Gently fold it in until it’s evenly distributed. You’ll see the batter become a little more liquidy, and that’s perfectly fine. If you’re doing a swirl, spoon half of the batter into your prepared loaf pan. Then, dollop spoonfuls of your swirl filling over the batter. Top with the remaining batter and gently spread to cover. If you’re not swirling, just spoon all the batter into the pan and spread it evenly. If you want a fancy top, you can sometimes push a little extra batter towards the edges to create a nice dome.
Step 7: Bake
Place the loaf pan in the preheated oven on the center rack. Bake for about 50-65 minutes. The exact time will vary depending on your oven. You’ll know it’s done when a wooden skewer or toothpick inserted into the center comes out clean, or with just a few moist crumbs attached (not wet batter!). If the top starts to brown too quickly, you can loosely tent it with aluminum foil for the last 15-20 minutes of baking.
Step 8: Cool & Glaze
Once it’s done, take the loaf pan out of the oven and let it cool in the pan for about 10-15 minutes. This allows it to firm up a bit. Then, carefully invert it onto a wire rack to cool completely. It’s really important to let it cool before glazing, otherwise the glaze will just melt right off! While it’s cooling, whisk together your glaze ingredients until smooth. Once the bread is completely cool, drizzle the glaze generously over the top. Let the glaze set for about 10-15 minutes before slicing.
Step 9: Slice & Serve
And there you have it! Your absolutely delicious, homemade zucchini bread. Use a serrated knife for the cleanest slices. I love serving it slightly warm, but it’s also fantastic at room temperature. Enjoy every moist, flavorful bite!
What to Serve It With
This zucchini bread is so versatile, it fits into pretty much any meal or occasion. For BREAKFAST, it’s a dream. I love a thick slice toasted up, maybe with a tiny smear of butter. It pairs perfectly with a hot cup of coffee or a refreshing glass of orange juice. It’s way more satisfying than a dry piece of toast, that’s for sure! For BRUNCH, it feels a little more elegant. I’ll slice it a bit thinner and arrange it on a pretty platter, maybe with some fresh berries on the side. It’s lovely with a mimosa or a sparkling cider. My kids love it as a sweet treat after school, so for COZY SNACKS, it’s just perfect. A big slice with a glass of cold milk is pure childhood bliss. And if you’re looking for a simple DESSERT, this is it! Serve a warm slice with a dollop of whipped cream or a scoop of vanilla bean ice cream. It’s surprisingly decadent. My family also loves to crumble a piece over some yogurt for a quick, healthy-ish snack. It’s honestly great anytime, anywhere!
Top Tips for Perfecting Your Zucchini Bread
After making this countless times, I’ve picked up a few tricks that I think really elevate it. First, about that ZUCCHINI PREP: While I don’t typically squeeze out the moisture, if your zucchini seems exceptionally watery (especially if it’s very ripe), you might want to give it a gentle squeeze to remove just a bit of excess liquid. Too much can make the bread gummy. Also, grating it on the medium side of a box grater works best. Too fine and it can disappear; too coarse and you might have noticeable bits. For MIXING ADVICE, I can’t stress enough the “don’t overmix” rule. Mix until just combined, and embrace those tiny streaks of flour – they’ll disappear during baking. The batter should be thick but pourable, not stiff. When it comes to SWIRL CUSTOMIZATION, if you’re doing a cinnamon-sugar swirl, mix about 2 tablespoons of sugar with 1 teaspoon of cinnamon and scatter it between layers, or marble it gently with a knife. For a cream cheese swirl, beat 4 oz of cream cheese with 1 tablespoon of sugar and a splash of vanilla, then dollop it in. For INGREDIENT SWAPS, I’ve successfully used half whole wheat flour and half all-purpose flour for a nuttier flavor and added fiber, though it can make the bread slightly denser. You can also swap the oil for melted and slightly cooled butter, but I find the oil yields a moister result that lasts longer. For BAKING TIPS, always do the toothpick test! Ovens vary so much, and a minute or two can make the difference between perfectly moist and slightly dry. If your oven tends to bake hot, consider lowering the temperature by 10-15 degrees. Finally, for GLAZE VARIATIONS, don’t be afraid to play! A little almond extract in place of vanilla adds a lovely nutty note. Or, add a tablespoon of cocoa powder for a chocolate glaze. Sometimes, if I’m in a real hurry, I just dust it with a little powdered sugar through a sieve – still delicious!
Storing and Reheating Tips
Storing this glorious zucchini bread is pretty straightforward, and thankfully, it stays moist for quite a while. For ROOM TEMPERATURE storage, once it’s completely cooled, I like to wrap it tightly in plastic wrap or place it in an airtight container. It should stay fresh and delicious for about 2-3 days. After that, the moisture can start to affect the texture a little. If it’s a very warm day or you’ve used lots of moist add-ins, you might want to consider refrigerating it sooner. For REFRIGERATOR STORAGE, wrapping it well in plastic wrap and then placing it in an airtight container will keep it fresh for up to a week. The texture might firm up a bit in the fridge, but it’s still wonderfully tasty. When you’re ready to eat it from the fridge, you can have it cold, or warm it up gently. To REHEAT, I usually pop a slice in the toaster oven for a few minutes until it’s warmed through and slightly crisped, or microwave it for about 15-20 seconds. For FREEZER INSTRUCTIONS, this bread freezes beautifully! Wrap individual slices or the whole loaf tightly in plastic wrap, then in aluminum foil, or place them in a freezer-safe bag. It will keep well in the freezer for up to 3 months. To thaw, just remove it from the freezer the night before and let it defrost at room temperature, or thaw slices in the toaster or microwave. Regarding the GLAZE TIMING ADVICE, I always apply the glaze *after* the bread has completely cooled. If you freeze the bread with the glaze on, it can sometimes become a little sticky or weep. It’s best to glaze it right before serving or after it’s thawed and brought back to room temperature.
Frequently Asked Questions
Final Thoughts
So, there you have it – my go-to, crowd-pleasing, utterly delicious zucchini bread recipe. I truly believe this is the best way to enjoy this classic quick bread. It’s got that perfect balance of moistness, spice, and sweetness that just makes you feel good. It’s a recipe that’s born from my own kitchen adventures, the ones that end with happy sighs and requests for seconds. It’s forgiving, it’s easy, and it’s incredibly rewarding. If you enjoy this recipe, you might also love my [Link to another related recipe, e.g., “Moist Banana Bread”] or my [Link to another related recipe, e.g., “Easy Apple Crumble”]. They share that same homey, comforting vibe. I really hope you give this zucchini bread a try. I can’t wait to hear what you think! If you make it, please leave a comment below and let me know how yours turned out, or share your favorite additions! Happy baking!

Chicken Bacon Ranch Casserole
Ingredients
Method
- Preheat oven to 350ºF. Grease a 9x13 inch baking pan.
- In a medium bowl, combine the chicken pieces with 0.5 teaspoon salt, 0.5 teaspoon pepper, and 2 tablespoons of Ranch dressing mix. Toss to coat.
- Cook the bacon until crisp and the penne pasta according to package directions until al dente. Drain both and set aside.
- In a large skillet over medium-high heat, melt 4 tablespoons of butter and 1 tablespoon of olive oil. Add the seasoned chicken pieces and cook, stirring occasionally, until browned and cooked through. Remove chicken from skillet with a slotted spoon and set aside.
- Reduce heat to medium. Add the chopped onion to the skillet and sauté in the drippings until softened and translucent, about 5-7 minutes. Add the minced garlic and sauté for another minute until fragrant.
- Add the remaining 4 tablespoons of butter to the skillet. Once melted, whisk in the flour, Italian seasoning, dried basil, and the remaining 1 tablespoon of Ranch dressing mix. Cook, stirring constantly, for 1-2 minutes.
- Gradually whisk in the chicken broth, about 0.5 cup at a time, stirring until smooth after each addition. Stir in the heavy cream and the can of cream of chicken soup. Bring the sauce to a simmer, stirring constantly, until it thickens. Stir in the shaved parmesan cheese until melted. Remove from heat.
- Add the cooked chopped bacon (reserve some for topping), chopped sun-dried tomatoes, cooked chicken, and cooked penne pasta to the sauce. Stir to combine everything evenly.
- Pour the pasta mixture into the prepared baking pan. Sprinkle the reserved chopped bacon over the top, followed by the Italian style cheese. Garnish with fresh or dried parsley, if desired.
- Bake uncovered at 350ºF for 25-30 minutes, or until the cheese is melted and bubbly and the edges are lightly browned.